Fortunately for those students who miss out on a coveted workshop spot (the 2-day workshops are fully booked until 2024), Jo has an exciting range of sculptures available as craft kits for you to try at home. Each kit comes with full instructions as well as access to a video showing the entire process. You can choose from outdoor plaster kits, and air drying clay kits for indoors and every sculpture will be completely unique, subject as it is to the creative license enjoyed by every sculptor.
I received my beautifully packaged kit from Jo and, taking my own advice to carve out some creative time for myself, I completed my little hare over the Easter break.
Stage One: Position the wire armature
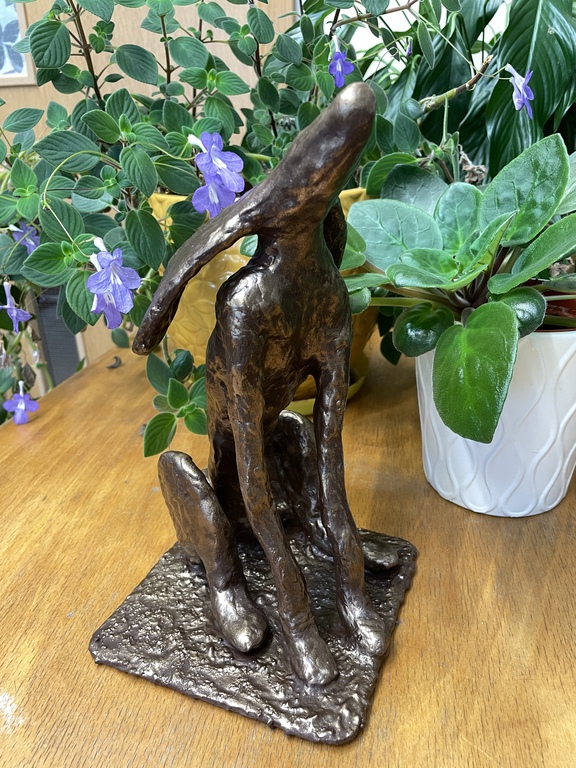
The armature is strong yet flexible enough for you to position it in a variety of poses. If you want your hare to be 'moon-gazing,' looking behind, ears pricked or back, or scratching an ear with a back foot; anything goes. I chose to have my hare in the moon-gazing position so that, eventually, it would be looking up at the parent.

Note the glass vial which contains a 'secret' message and also gives some depth to the chest area which would be naturally deep to accommodate the lungs within the ribcage.
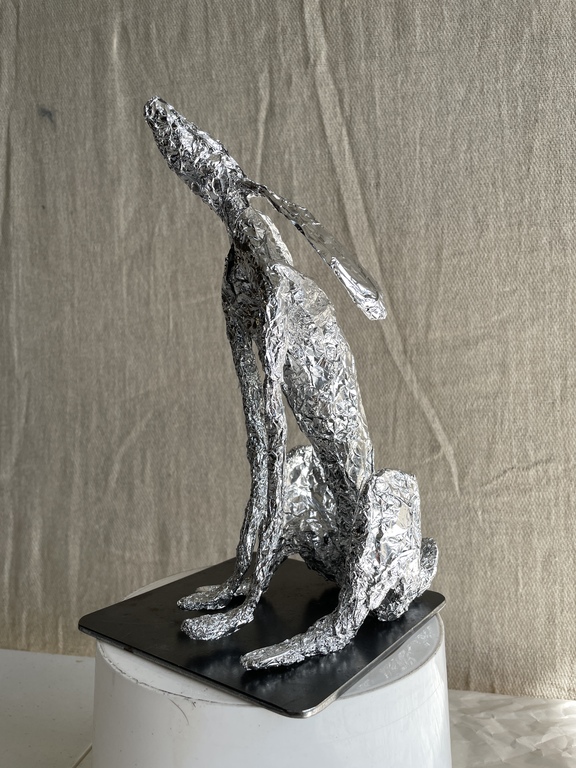
Stage Two: Wrap the armature in tin foil
This is where you can start to really see the hare's shape come to life. By adding foil to build up areas such as the head and ears, and the muscular thighs, the sculpture starts to take on the qualities of the animal.
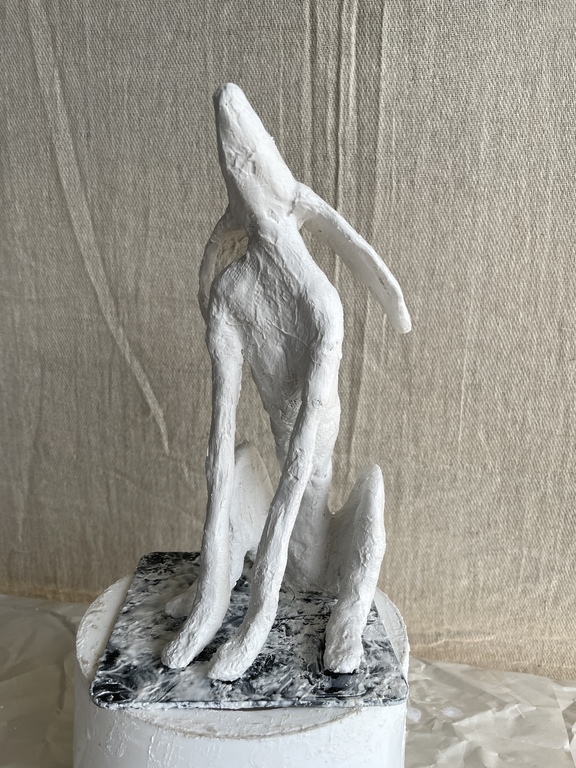
Stage Three: Wrap the sculpture with Modroc
Modroc is plaster bandage used for modelling, crafting and casting. After cutting into strips, each piece is held in a bowl of water for 4 seconds, the excess water is squeezed out, and the Modroc can then be applied to the foil. It can be moved, moulded, layered, and adjusted easily while still wet. Once it starts to dry, it becomes more difficult to maintain the fluidity of the material and so it is wise to work quickly and calmly. You can ease its use by wetting your fingers and using them to mould and move the Modroc if it is starting to dry a little too quickly. I did this on a windy day in the garage: I had to work quite confidently to get the desired effect.
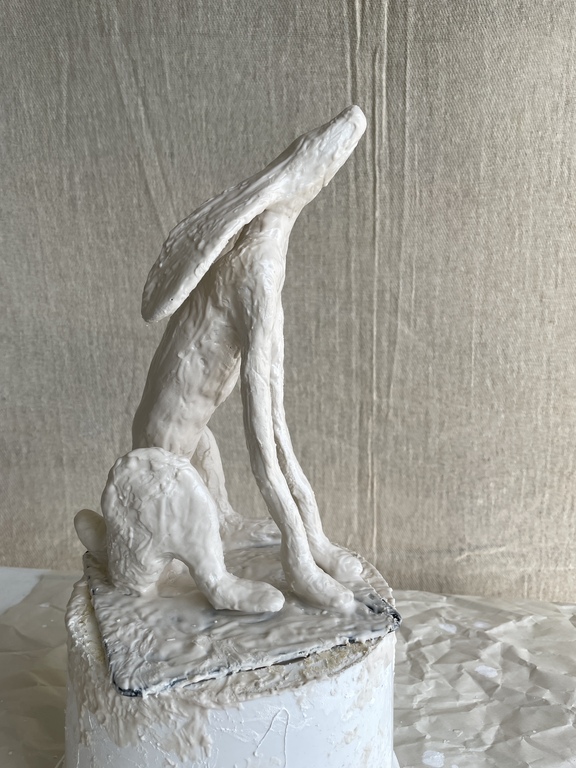
Stage Four: Applying water-resistant liquid plaster
This is such a yummy stage. The plaster is mixed with water to a double cream consistency and then is simply scooped out by hand a little at a time before applying it to the still slightly damp sculpture. While watching out for big drips, it is deliciously easy allowing it to gently flow, ooze, and slide over the hare. As it drips onto the base plate, it forms a textural surface that will add to the overall effect as the sculpture dries and is ready for the next stage: painting. I repeated this plaster stage with the extra bag of plaster provided in the kit as I wasn't 100% happy with the coverage I had achieved.
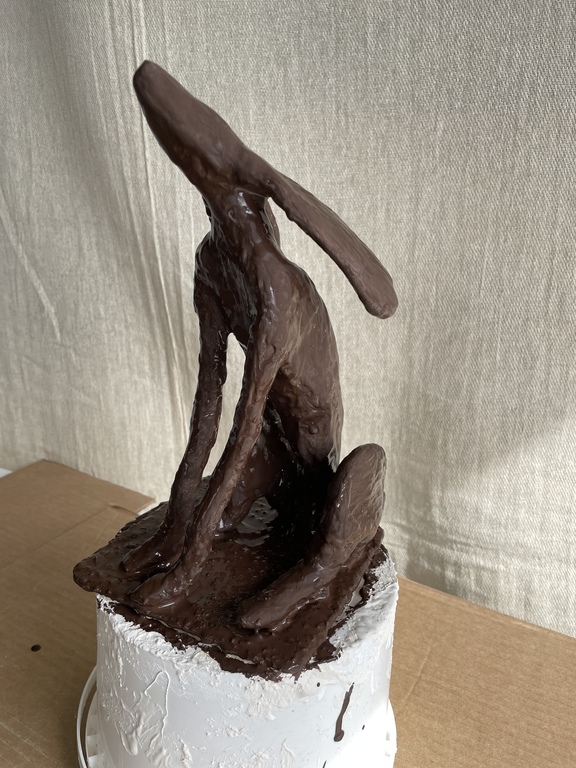
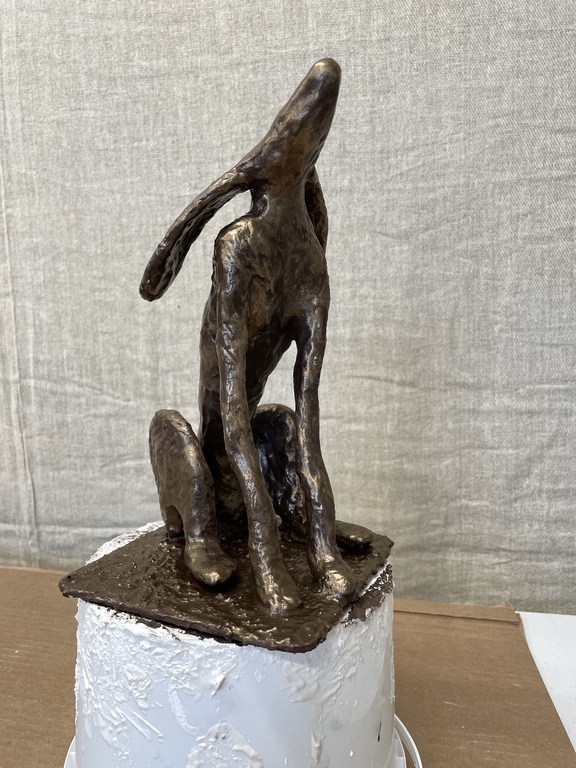
Stage Five: Painting!
Powertex Bronze Universal Medium is used to paint the sculpture. Imagine a chocolate fountain and you're pretty close to the appearance of this water-based textile hardener that is used for sculpture (as well as many other applications). It requires thorough mixing before use and I applied it to my sculpture with the brushes supplied in the kit. The Powertex is incredibly easy to apply but, as I am a fusspot, I revisited my work 2 or 3 times to titivate and improve areas that weren't 'perfect' in my eyes. Finally however, I was happy with the finish and left it to dry overnight again before the final stage.
Stage Six: Gilding
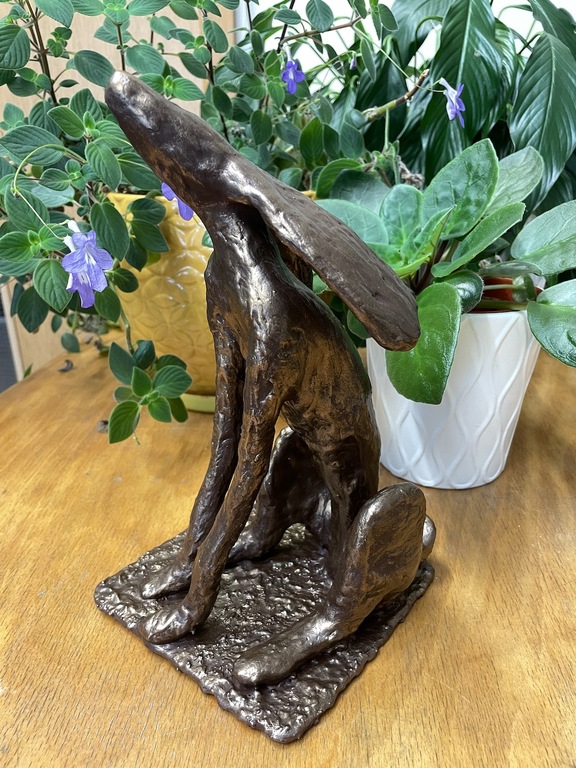
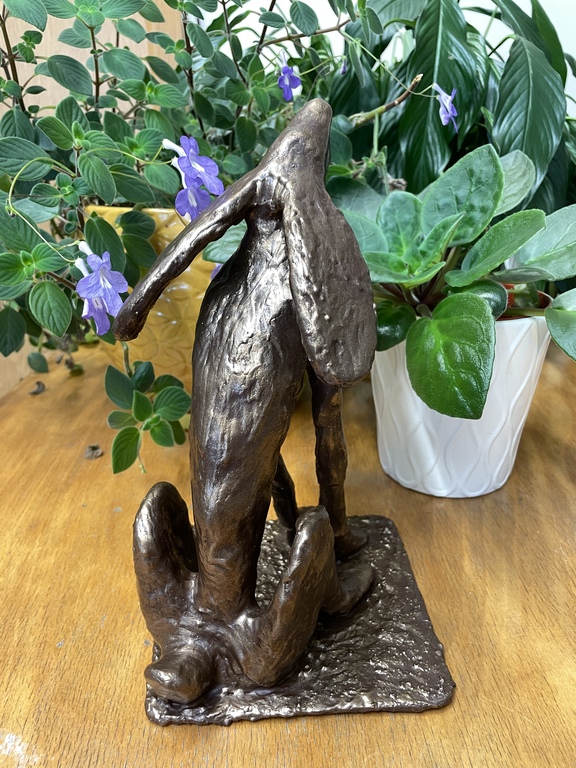
The hare kit comes with a very tiny amount of bronze gilding cream and a small applicator sponge. You really do only need a 'teensy weensy' (Jo's words) amount and it is applied with the lightest of touches, stroking it over the undulating surface to pick up the highlights of the sculpture. This is the stage where it really is quite difficult knowing when enough is enough. Even now, I keep returning to my sculpture with a critical eye and thinking that maybe just a touch more here or there! The gilding stage is where your sculpture comes to life!
Thank you Jo for such a beautiful craft kit, thoughtfully and practically put together so that even somebody with absolutely no experience of sculpting can have a go and produce a sculpture they can proudly show off to friends and family. They will be amazed and thoroughly impressed!
Jo Garden Art - craft kits
Guess How Much I Love you? - Waterstones