By Alex Bradley
Who would have thought that during a global pandemic you could not only learn some jewellery skills but even create your own unique piece?
Rose Wood Jewellery has a silver ring carving kit, which is posted to you for you to design and make a wax ring, which is then cast in silver – giving you a unique, handmade and personally designed piece of jewellery. The kit comes with expert instruction from Rose and you get to do it all with cuppa from the comfort of your own - too good to be true?
Alex gave it a go and here's her honest review…
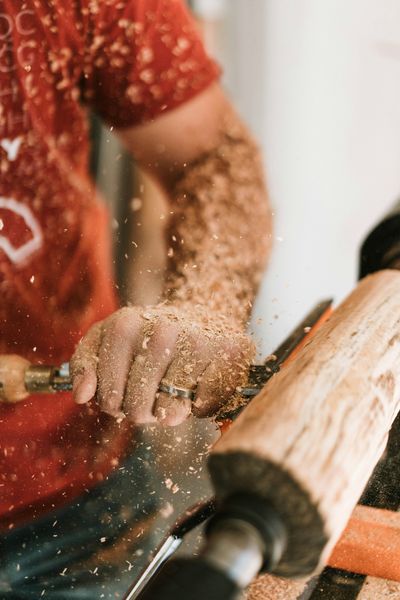
 Silver ring carving kit, design sketches and a cuppa
First off, I have a confession to make - I have actually been to one of Rose’s in-person silver jewellery making workshops before. I made a treasured silver bangle. She was a fantastic tutor and a lovely person so I suspected this kit would be great too. This past experience by no means makes me an expert though and I had never done this particular type of jewellery making, wax carving and sand casting, before. So, in this sense I was a total beginner and despite loving crafting of all sorts, I am pretty clumsy – the moral being: if I can do it, you definitely can!
There is nothing better than getting parcels in the mail, especially when they contain craft kits! It was all beautifully packaged and included everything I needed to get started (immediately!), even some space to sketch designs in the instruction guide and a pencil!
The kit includes:
- Two wax ring blanks (thankfully – I will come on to that!)
- Two craft knives
- A rubber thimble (also very handy)
- A lighter and tea light (not for ambience!)
- An instruction booklet and pencil
- Fine and rough sand paper
- A pre-paid return envelope and returns form
Plus, of course casting and finishing of one silver ring, and the option to pay extra to get the second one cast too.
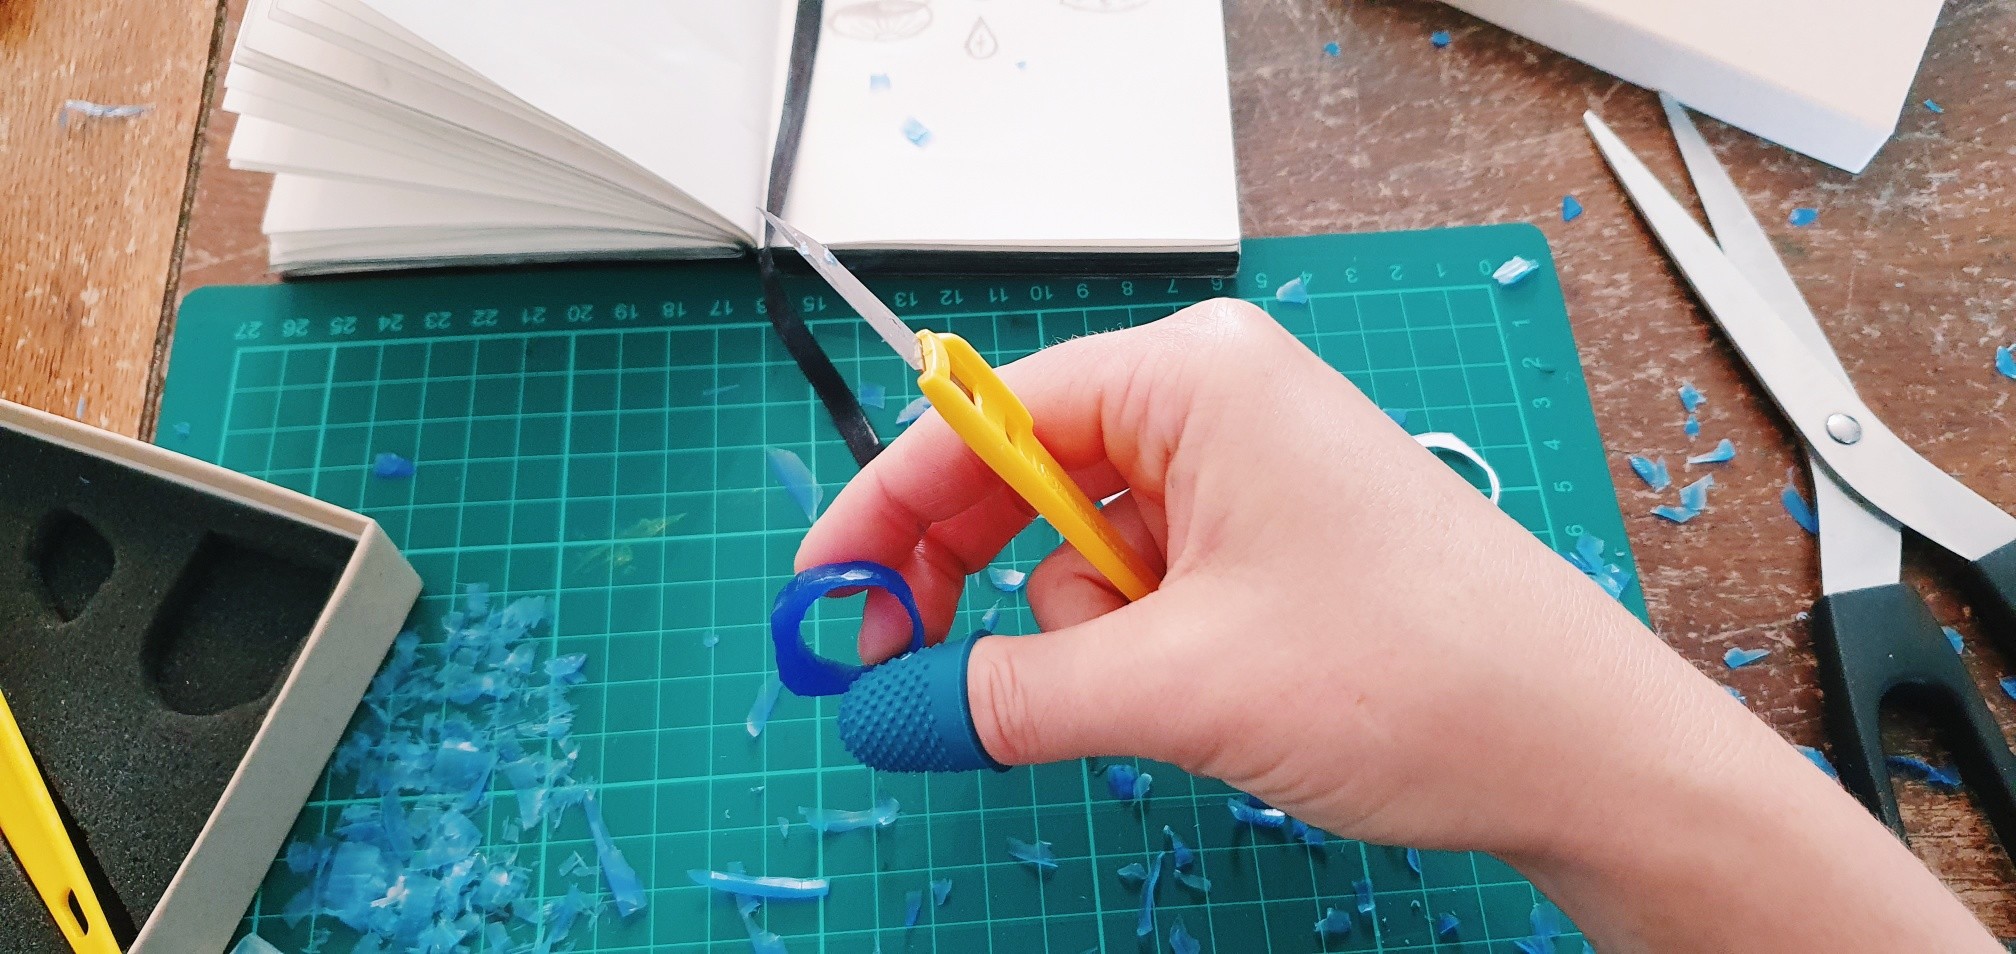
After watching Rose’s instruction video and a quick read of the instructional manual to make sure I hadn’t missed anything I set about finalising my designs. I had already started some ideas in my sketchbook before the kit arrived so it was just a case of refining these taking on board some of Rose’s tips. Though admittedly I chanced my arm and included some fine detail in my designs…which I was advised may not show up in the casting process! Always pushing boundaries, tut tut.
 Lesson learned. Pressed too hard and made the ring too thin!
And now we come to my first top tip (aka lesson learned the hard way):
Don’t try to make your ring too thin.
One of my designs was based on having a very fine band…I wouldn’t recommend it. I was pressing on it pretty hard whilst intensely carving with the craft knife and BAM, it split. Needless to say the thimble was handy during the process too! Moving on I decided to do a different, chunkier design – and that worked out much better.
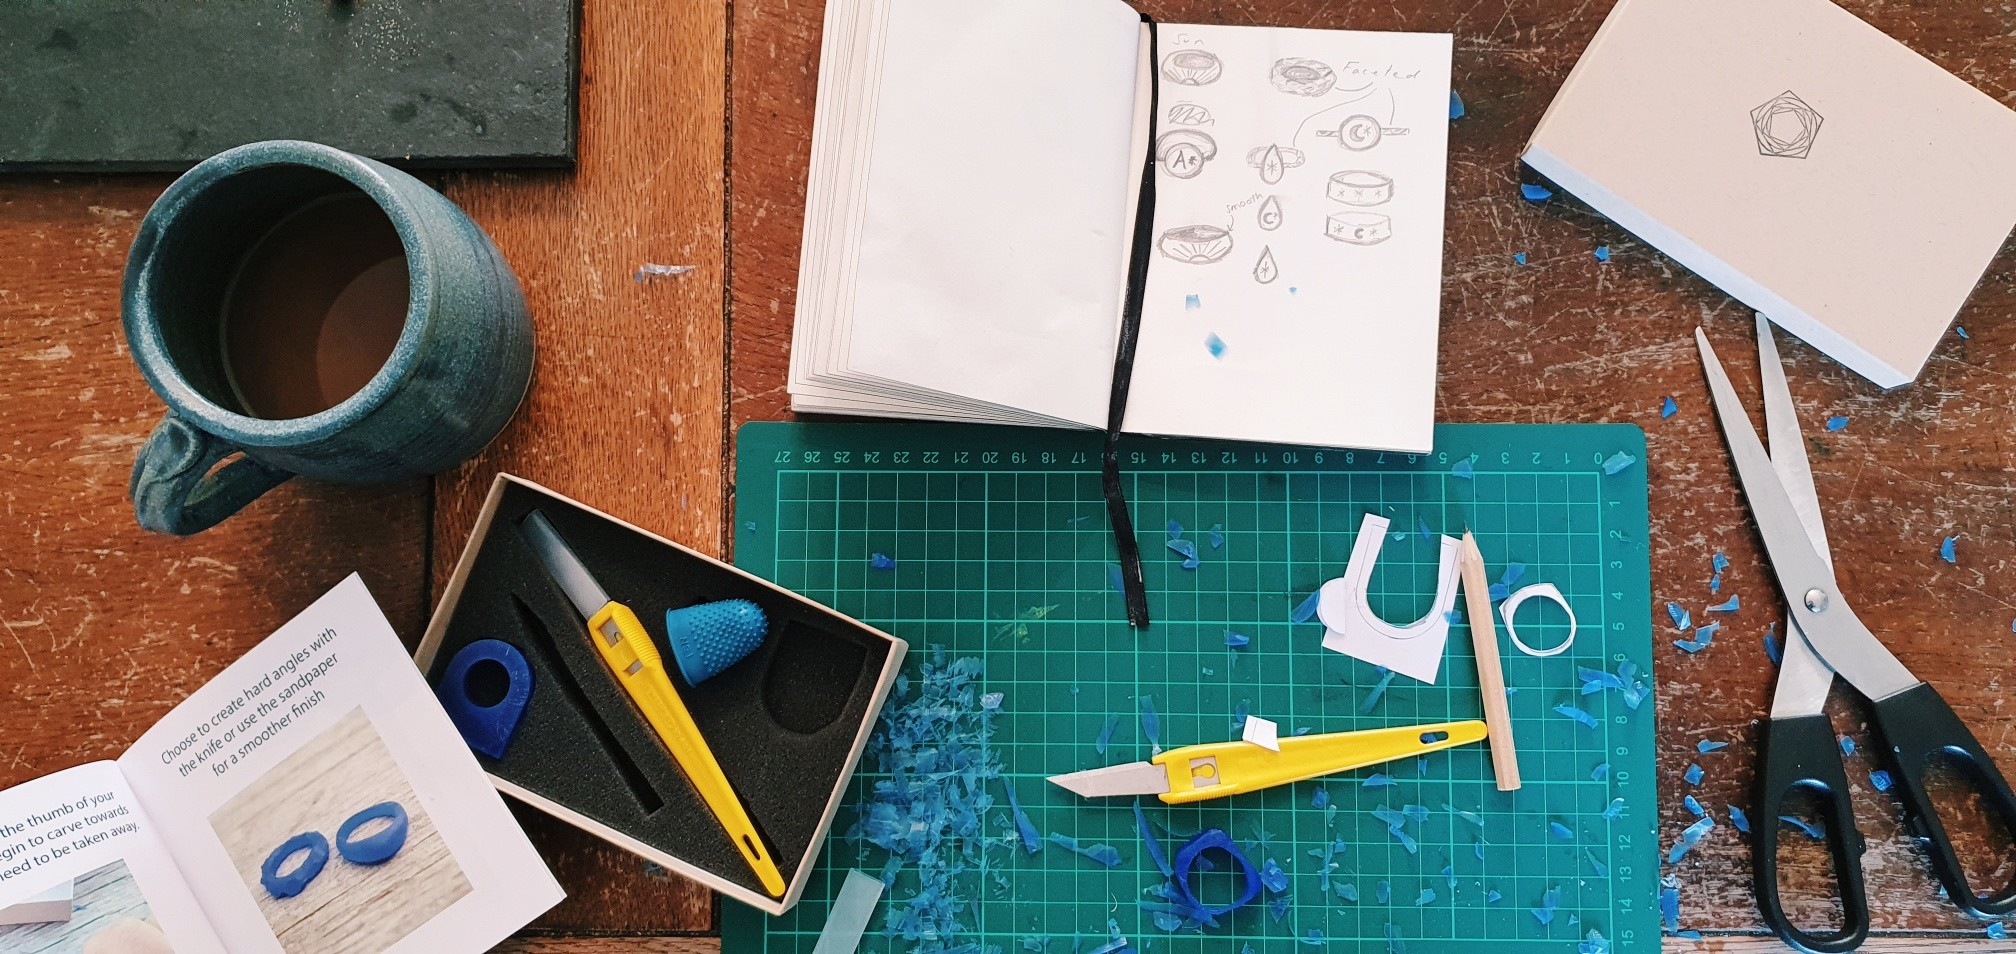
 Design sheet for top, bottom and sides.
I formed the basic shape using the craft knife, trying it on regularly to make sure it remained the right size for my finger, sat comfortably and looked correct on my hand. I had decided on a fairly symmetrical design and it is pretty tricky to get it perfect: a little sliver off here, a little more there and so on until I was happy. It wasn’t exact but I was pleased with the shape and who wants perfect anyway – I like that it has my unique touch!
 Carving the wax ring - trying to make it symmetrical.
I gave it a good sanding to smooth it out and then set about carving in my design. I wanted to create a ring that reminded me of these strange, dark times but spoke of hope, happiness and light so I went for sun beams. Coming up with the design was way easier than transferring it to the wax, but with patience and a steady hand I etched in my sunrise.
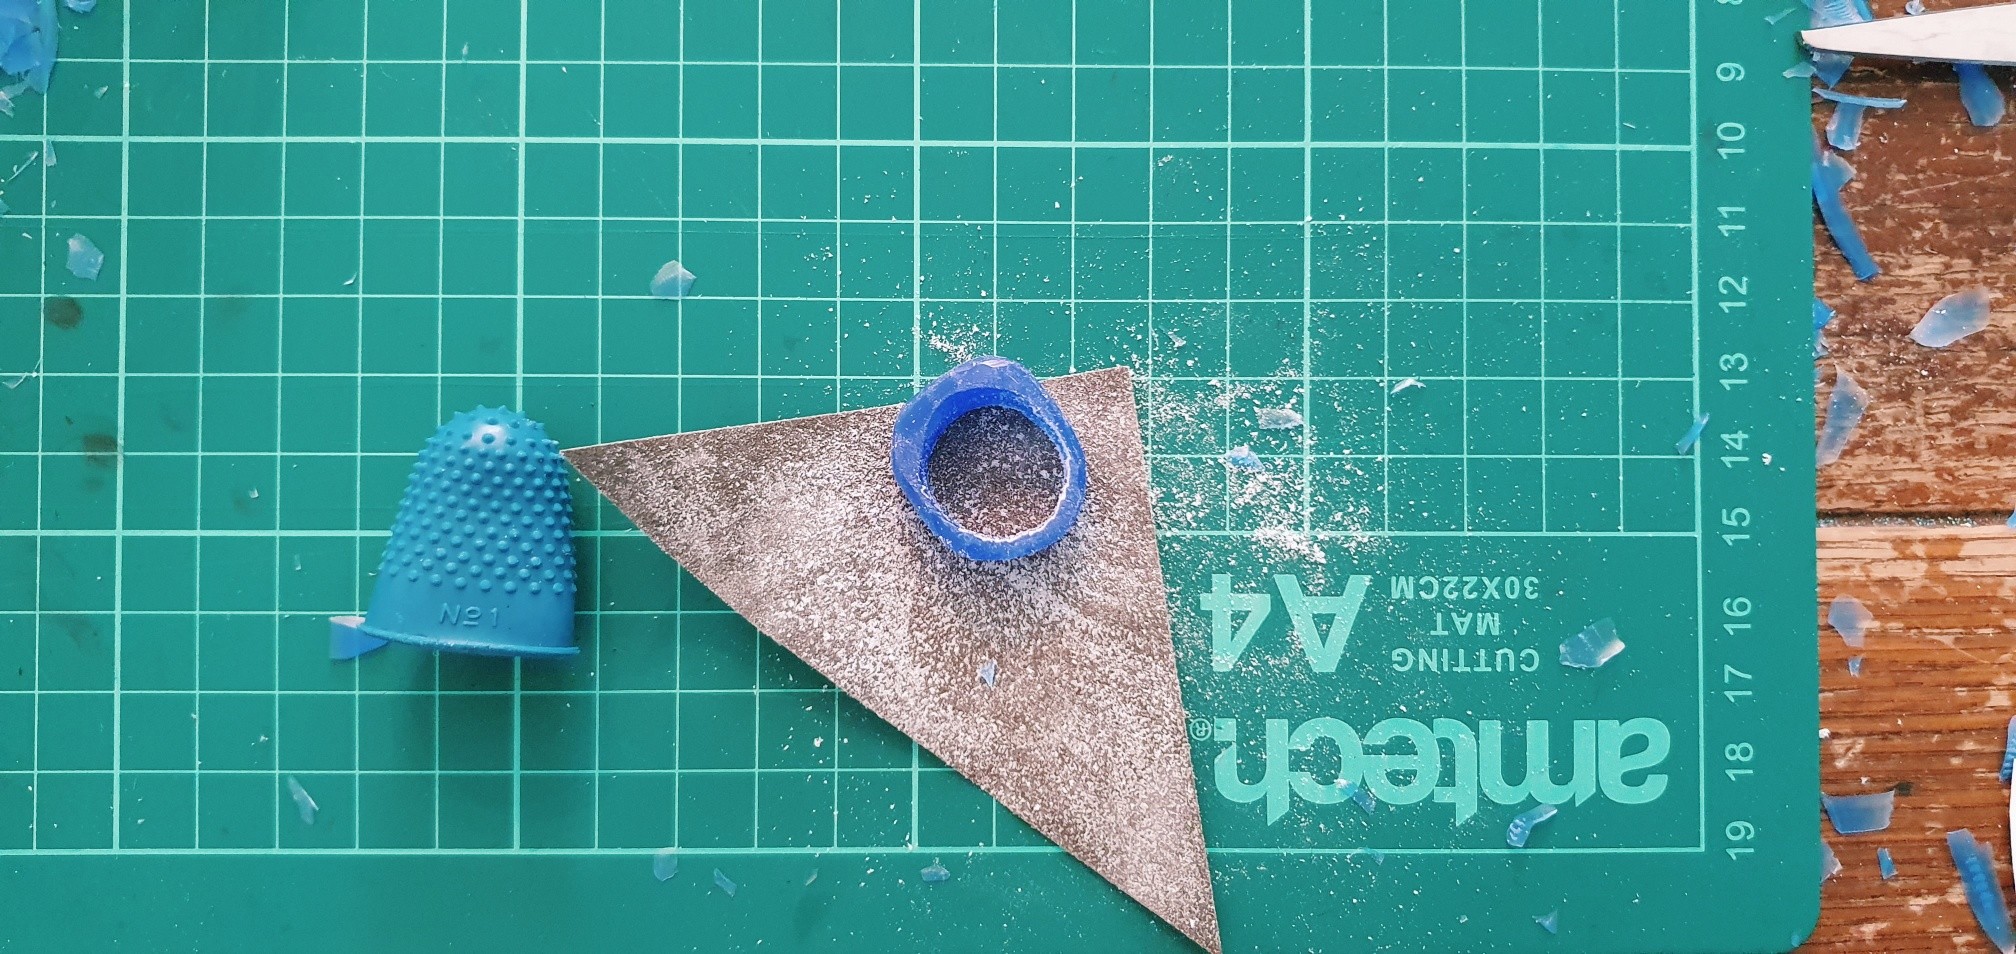 Refining the finish by sanding the ring.
Another light sand to even out my etchings and it was time to put the candle to good use. To create a smooth finish to your wax, and as a result your final ring, you have to slowly pass the wax through a flame, but not for too long or it will melt. I had a little practice with my broken ring first and then did my final piece. The wax can go a little black in places, but don’t worry this seems to be normal. I popped it in the box along with my form explaining how I would like it finished (I went for a polished finish but you can opt for matt, or even gold for a little extra) and put it in the post box on my lane.
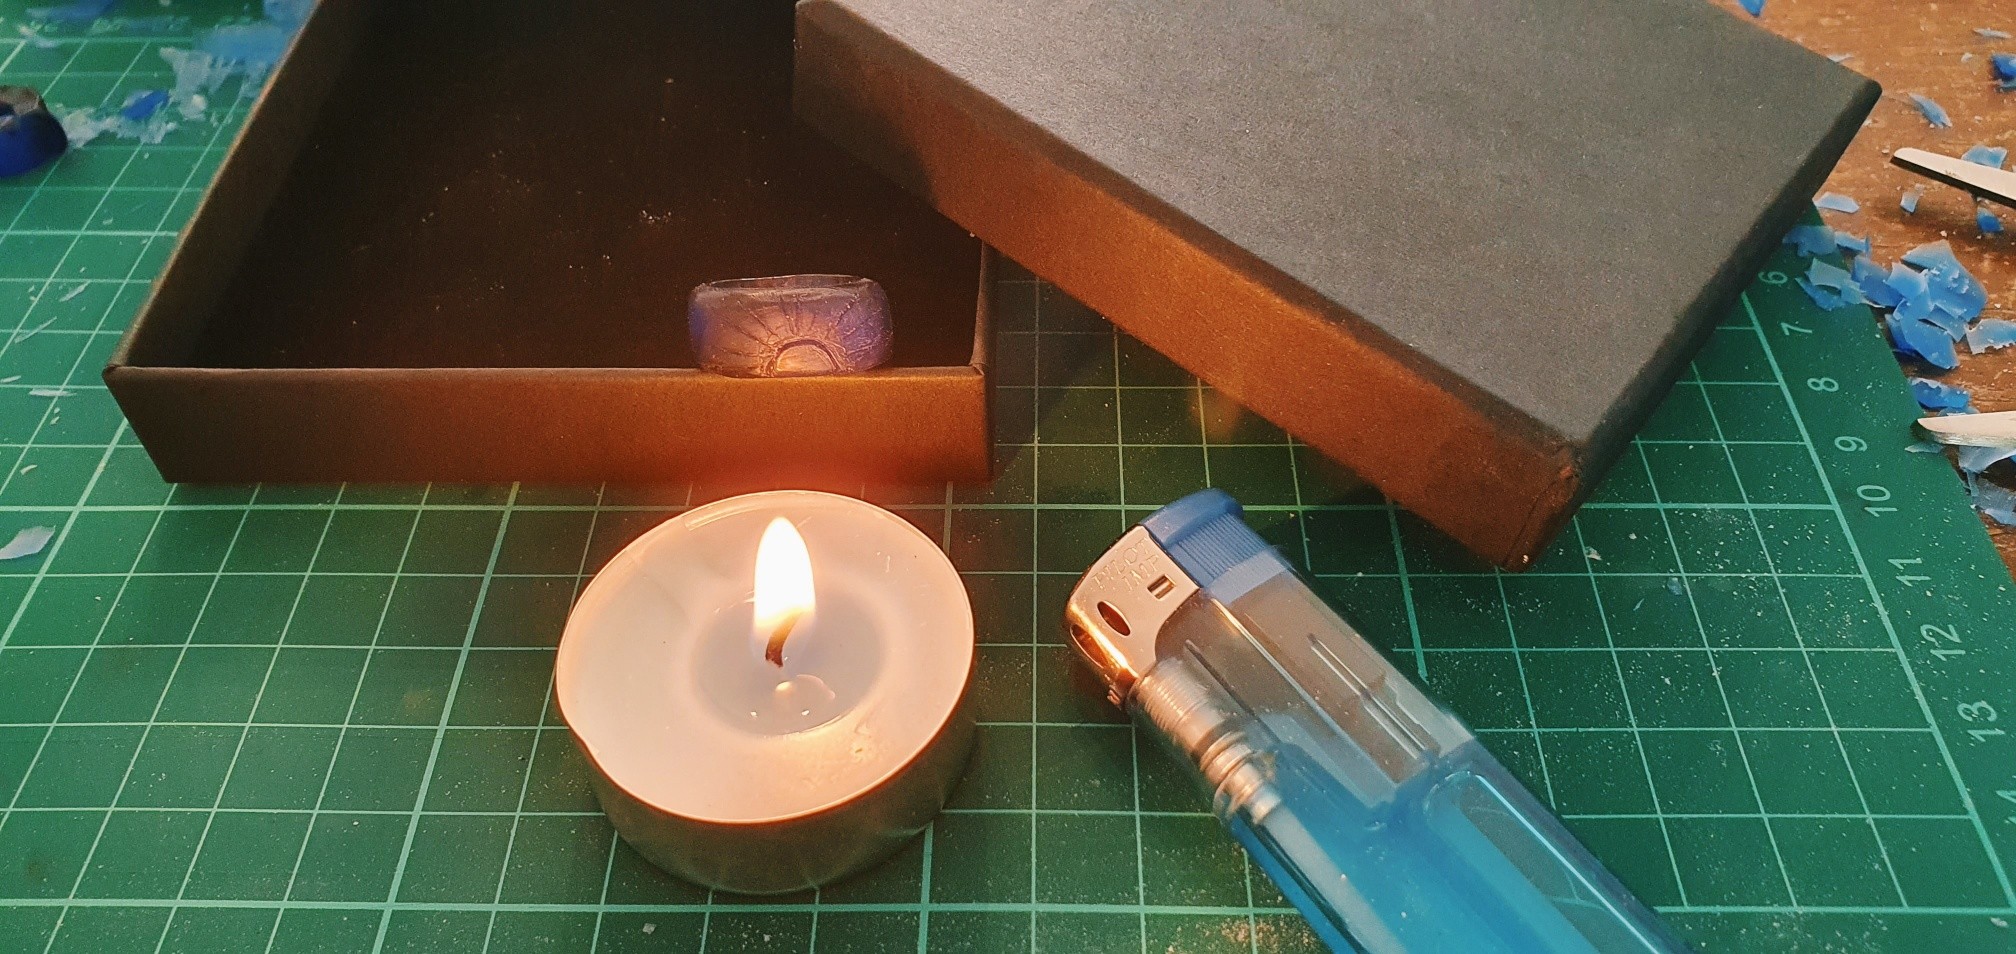 Create a smooth finish to the wax by passing it through a flame.
 The finished wax ring ready to return to Rose for casting.
I asked Rose to send me some photos of the process at her end – the sand casting and turning molten silver into a piece of jewellery is fascinating. First she creates a mould in the sand and removes the wax ring, then she pours silver into the sealed mould. Once cast the ring then gets filed until it is smooth and then polished until it is super shiny. Wow.
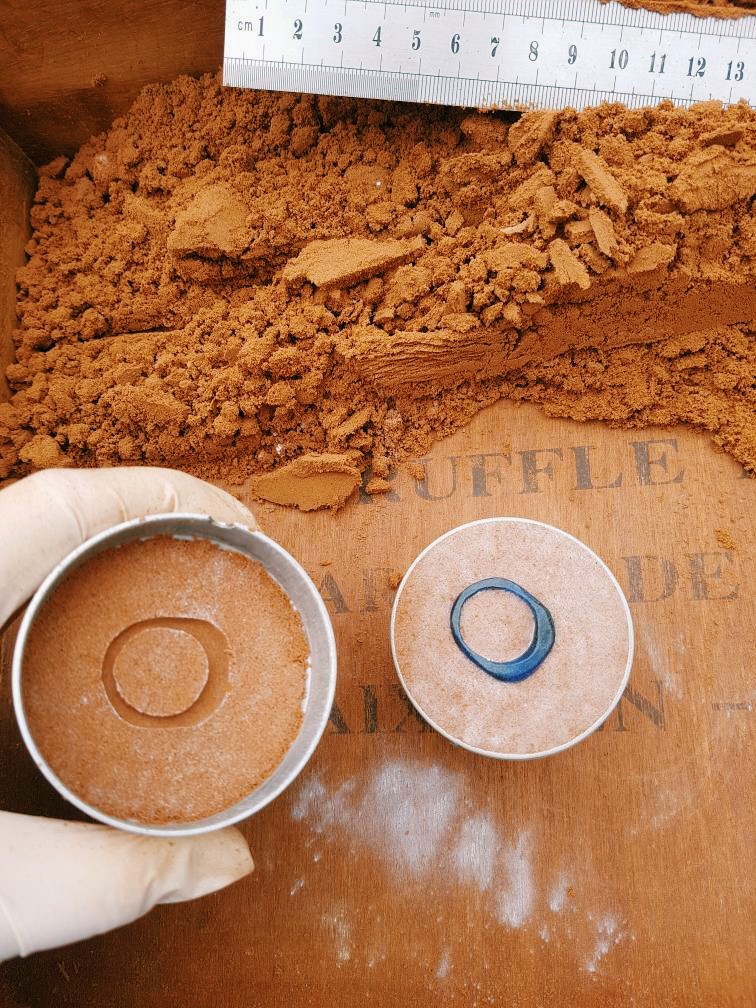 Rose creating the sand cast mould.
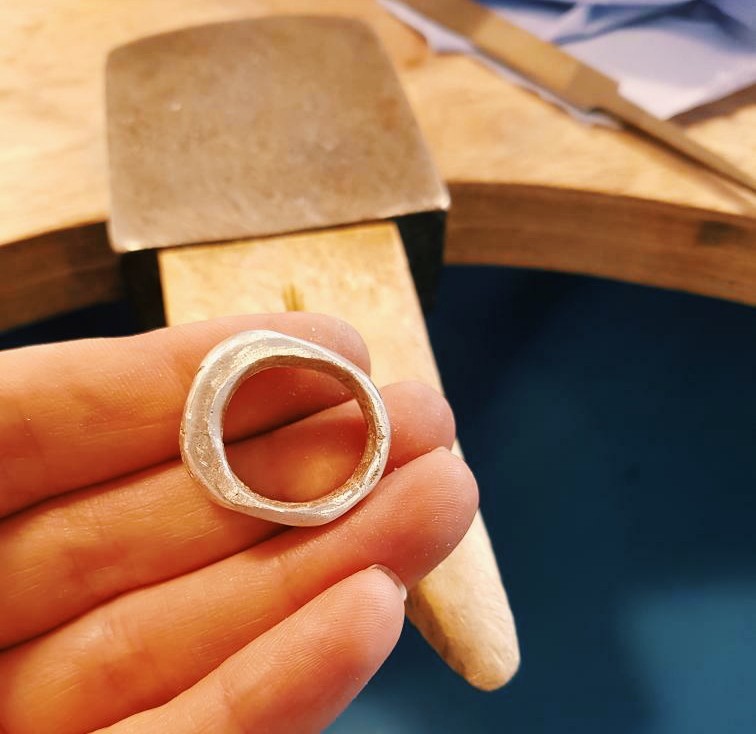
 Silver cast ring ready to come out of the mould.
 The ring all filled and ready for polishing.
I received my finished ring back (and the detail came out - hooray!) really quickly, though it can take up to 3 weeks depending on Rose’s schedule, and have worn it proudly ever since. The carving process is great fun and I am tempted to get more wax just to play around with some of the designs I have dancing in my head after this wonderful experience.
In short, I came out of lockdown (or sort of out) with a new skill, a new piece of jewellery, and most importantly some positive memories, where I got to relax, be creative and get into peaceful state of mind with no distractions from the news!
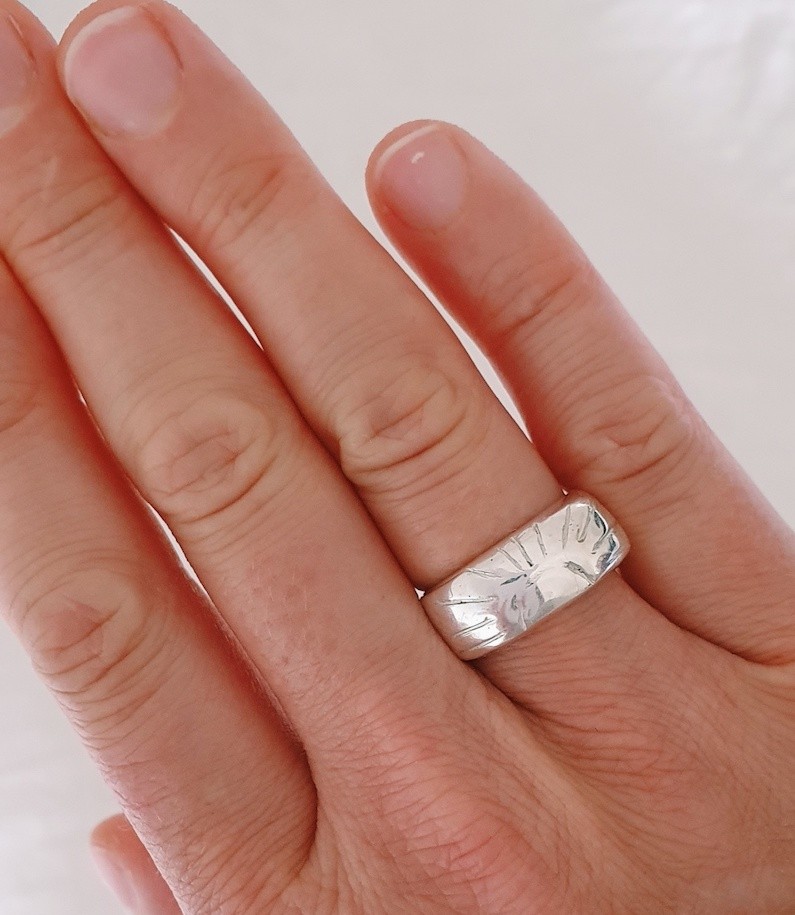 The final ring - full of positive memories.
If you fancy having a go at making your own silver ring carved from wax from your home you can buy the kit here.
Or if you would like to try one of Rose’s highly recommended in-person then have a browse here too.
If you enjoyed reading this you might like to look at some of our other special lockdown articles >