By writer and DIY Dad Ben Scher
Treehouses are the epitome of a happy childhood. Summer afternoons spent with friends nestled amongst the shady leaves, inventing club rules and spying on unwitting grown-ups below - that's what happy memories are made of.
My kids have got enough toys and electronics that can only be played with in certain ways, so I figured something that would spark imaginative games would be good for them.
“I'm just going to build a treehouse,” I announced, and off I went.

A few years ago I attended a carpentry evening class and built, over the weeks, a small table. It was one of the most fun things I've ever done, I really loved it. Since then I've been putting those skills to use by building all sorts of things in wood.
If you're not confident, I would wholeheartedly recommend joining a woodworking class to get some basic skills; it will be useful and you'll love it.
Have a browse through the classes listed on this website and pick something nearby you like the sound of.

First I needed a tree. Luckily we have quite a lot of trees in our garden but there was really only one that was suitable, a big, unkempt horse chestnut tree. I got my ladder and climbed up into its branches and tried to imagine the floor of the den. It was tricky to picture, but it looked like there was the makings of a good space up there.
Next I took my saw and hacked out all the branches that were in the way. Some were dead and came out easily, others were healthy and I felt really bad; was I hurting the tree by doing this? I stopped briefly to Google 'does cutting branches hurt a tree' but there was no definitive answer. Since these were small branches, and they didn't have many leaves on, I figured it would probably be OK.
By now I'd created a space in the heart of the tree onto which I was going to build my wooden platform. Being a disorganised fool, I had to go to the shops to buy the materials I would need. Obviously I should have got everything ready in advance, but I'd got carried away and had started without being properly prepared.
On my shopping list were:
- several lengths of treated wood for the structural frame – something quite chunky, taller than it is wide, such as CLS 38mm x 63mm
- lots of planks (scaffold boards or decking) for the floor – treated so they'd survive outside
- box of coach screws at least twice as long as my frame wood is thick
- box of thin, long screws to attach the floor and the railings.

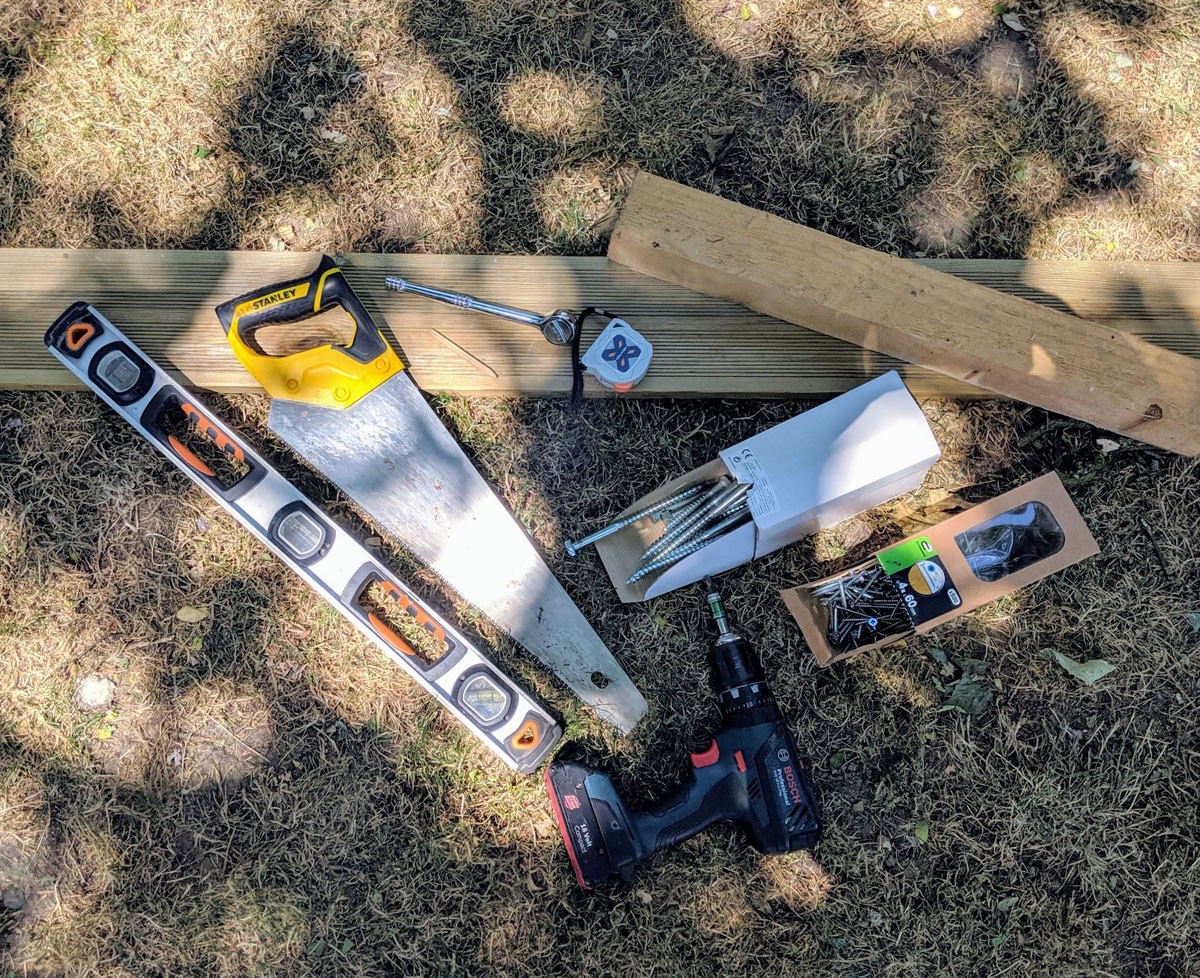
Once I'd returned with my supplies I got the tools I'd need:
- ladder
- saw
- cordless drill / screwdriver
- drill bit slightly smaller than the coach screws
- spirit level
- a ratchet spanner for the coach screws
- tape measure
- pencil
- radio (it's against the law to work without listening to Steve Wright in the afternoon).
The important bit of any structure like this is to ensure it's strong enough for your kids and their friends. Imagine there are going to be 10 people up there; it's got to be sturdy! With this in my mind the whole time, I always put in a few more screws than is strictly necessary, just in case.
I had my materials, my tools, and the space in the tree was ready, so I was good to go. Next job; sit down and have a cup of tea. It's useful to take a step back and just look at the project because you never know where inspiration will come from.
I sat at the foot of the tree for a good ten minutes, just looking at it all whilst I had my tea. In fact nothing came of it and I was just skiving, but you never know.
Once my break was over I got started. Using my spirit level and pencil I marked out where my frame was going to go.
It's important that everything is properly level otherwise things like telescopes and fig rolls might fall off.

I then measured for my first piece of wood for the frame, climbed down the tree, cut it, and climbed back up with my drill and drill bit. Holding the wood in place along the horizontal lines I'd marked earlier, I drilled through into the tree, removing the wood to then drill deeper into the tree. This does hurt the tree a bit, but by using sharp tools you minimise the damage, and the tree can easily recover. I started with two holes, one at either end of the wood, then imagined my kids were playing up there and drilled a few more holes for a few more coach screws. Remember; more than strictly necessary. I then inserted the coach screws to attach the wood to the tree, tightening fully using the ratchet spanner.

Once all of the frame was in place and firmly bolted to the tree, I measured for the floorboards. This bit was really satisfying because it was when it finally started to look like a treehouse. I screwed the boards into the frame, leaving a small gap between them so rain doesn't form puddles, but not so wide that telescopes and fig rolls can fall though.
At this point I invited everyone to come and have a look. “Be careful,” I warned, “it's not finished yet.” But I wanted to see if it was any good so far, and it was – just the right height, and nice and sturdy. And everyone was now excited to see it finished!
The final stage of the build involved creating the railings, to keep the inhabitants of the treehouse safe. For these I used the branches I'd cut down right at the beginning. I went and measured my kids and then cut the branches to the appropriate length (about chest height for the smallest child). During one of my tea breaks I realised that it's important to have vertical railings rather than horizontal ones, so they can't climb up and over them. Building the railings involved a lot of measuring, cutting, drilling, and screwing, but once done helped make the treehouse safe. And it also made it blend nicely into the tree since it had been partly built using its own wood.

I found an old ladder at a junk sale and leant this up against the tree, bolting it into place. I also added a pulley and a basket, and an old bell, just for added fun. And that was that; the treehouse was done.
The kids love it up there. I don't know what they get up to - I'm not allowed to climb up since I don't know the secret password.
Suffice to say it involves friends, inventing club rules and spying on us grown-ups below. Oh, and creating memories that will last a lifetime.

Inspired by DIY Dad? Brush up your own skills with woodworking courses or learn how to use freshly cut timber in your creations on a traditional woodlands crafts course.