It all began with an invite to a phenomenal venue, nestled in 75 acres of stunning scenery in Scotland! CraftCourses Fran visited one of our fabulous craft locations to have a creative retreat and learn all about eco-dyeing and botanical printing.
To read Fran’s emphatic review of her stay and more about this stunning venue find more information here. Fran stayed for a 2-night creative retreat and selected to take part in an indigo dyeing and botanical printing experience for the weekend. Sustainability and crafts using natural products have experienced a real surge in the past 12 months and being creative with nature is really on trend. Have you ever wanted to try using natural plant dyes or creating prints with botanicals? Here’s Fran to tell us how it went…
The stunning location for Fran's retreat, Gartmore House
On the first night I arrived at Gartmore I couldn’t wait to meet with the other crafters. There were three workshops taking place over the weekend, photography, lace making and eco-printing and indigo dyeingwith 20 crafters staying altogether. We all met in the lounge and exchanged stories about who had travelled the furthest, (I had won by quite some distance, travelling from Pembrokeshire.)
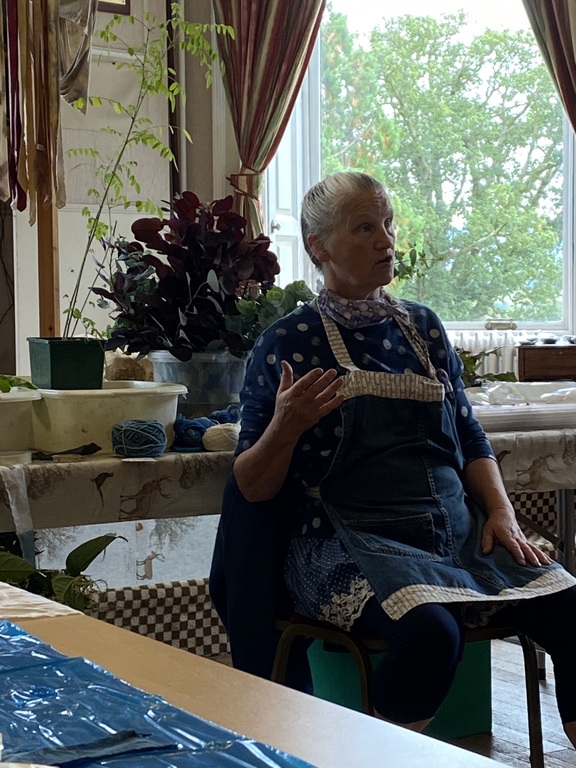
I was very lucky to meet my course tutor for the weekend, Liz, on the first night. We got chatting about what to expect from the course over the next couple of days. She said the two elements were very different and that some people would be more interested in the indigo dyeing and some in the printing. Whilst I swayed towards the botanical printing, I reassured her I was simply delighted to be learning any new crafts and was equally intrigued by both. Chatting to her meant I became even more excited about what was ahead of me for the weekend.
Course tutor, Liz, she was incredibly inspiring
On the Saturday morning, after a fantastic breakfast, we set off to the studio and Liz introduced us to what we would be learning for the weekend and what we would achieve with the processes we would be looking at. Liz had a range of clothing items and art pieces that had been created using the techniques of natural botanical printing and indigo dyeing and we were excited about creating our own.
Liz shared the story about her creative background, as a textile artist specialising in handmade felt from sheep’s wool, even creating pieces for royalty!! I was hooked!! She told us how her home is a converted railway station platform, where she has an open studio and incredible Air BnB opportunities (future holiday inspiration!!!). To read more about this genuinely fascinating master crafter you can check out her website Heartfelt by Liz.
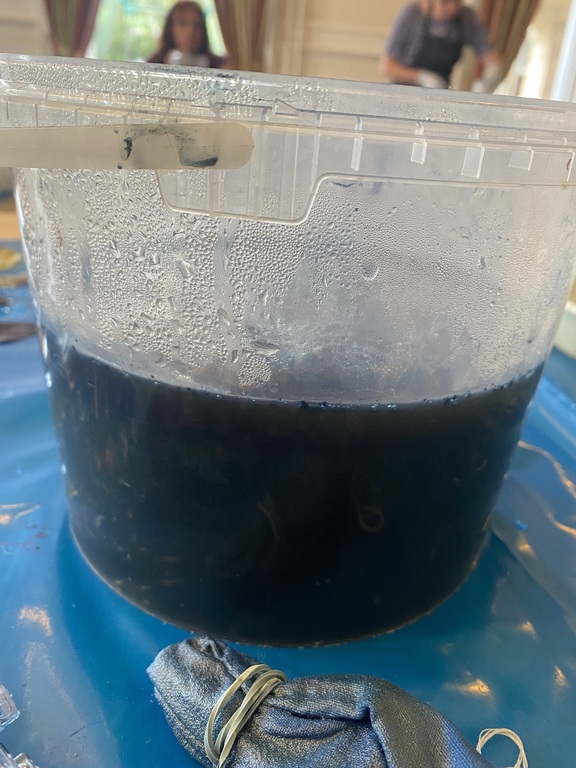
A vat of indigo dye
After a fantastic introduction on the history of indigo dye and how it is created we were taught how to make our own vat to use throughout the session. I had no idea that there was a plant called woad that grows natively in the UK that can be used to create an indigo dye. We were provided with a powdered indigo, and along with two other ingredients, we added them to boiling water. We had to mix the ingredients for a set time and then leave the mixture on a heated blanket for a couple of hours to develop, until a 'flower' shape developed on the top. (Mine had a fantastic bloom.) Liz advised that we needed to speak to our indigo like a loved family pet to encourage its development, she was very convincing and you can imagine the scene of 7 grown women speaking lovingly to their potions.
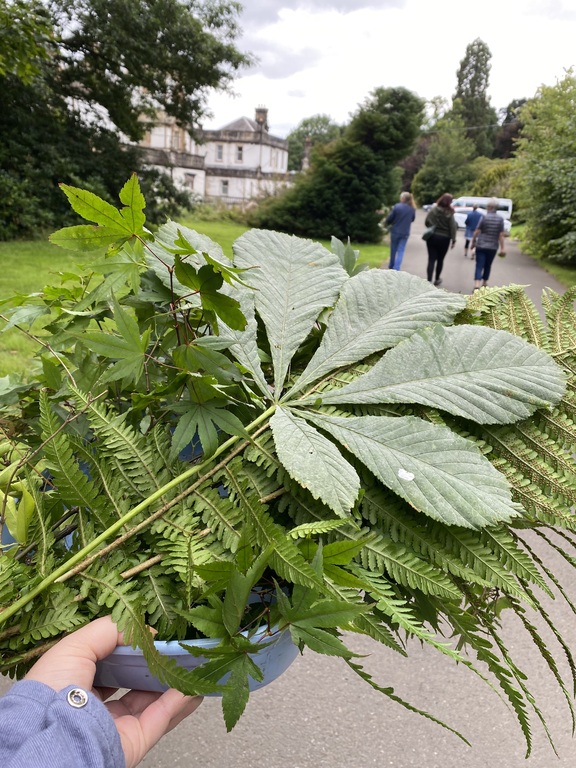
We had a walk in the grounds to collect our botanicals
As our indigo was developing Liz got us up and out into the stunning grounds around the house. We had a nature ramble and foraged for some great botanical shapes that would make great prints. Liz was very knowledgeable about all the plant life and very experienced about what would make a great transfer, although she was happy for us to experiment if we found something we were eager to try. I knew this would be a craft I would be trying again at home as I love to explore the countryside around me and make the most of the plants in my garden.
We had fun with our indigo dye
"Grab your indigo dyes, speak nicely to them, they are about to produce magical results" Liz had us buzzing with excitement the whole session!
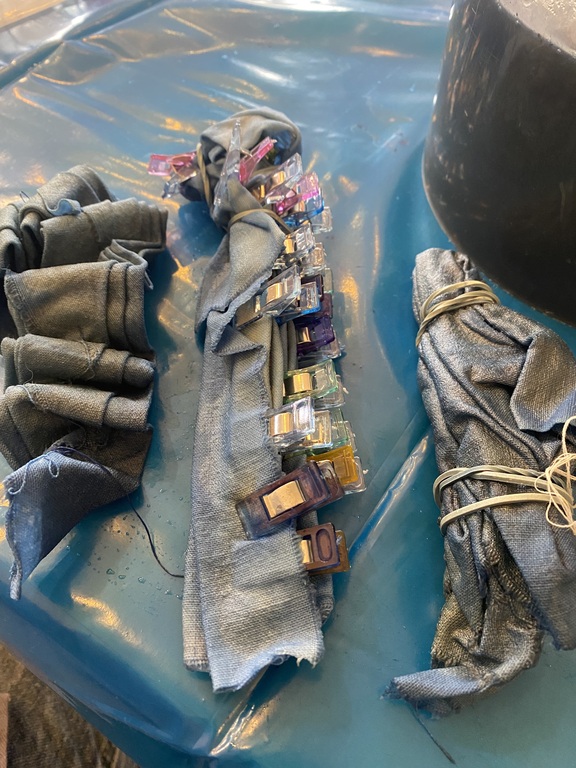
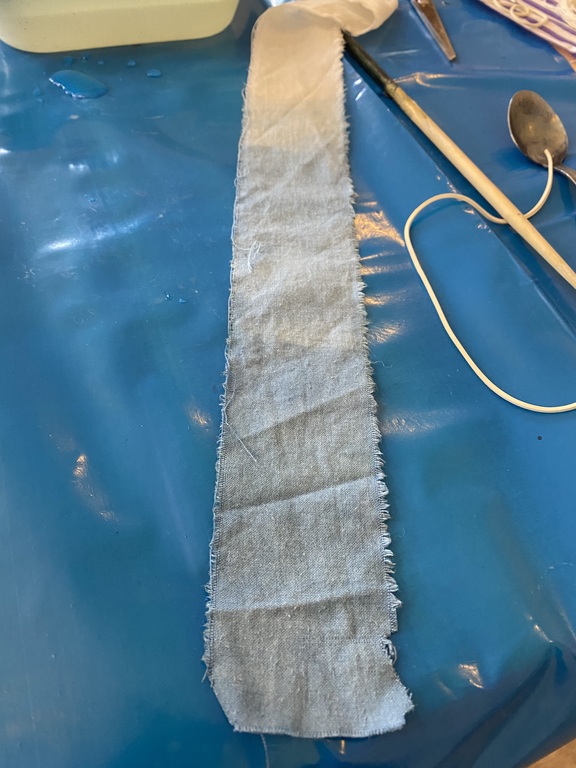
When we returned from foraging in the grounds our indigo vats were ready to go. So, we put aside our botanical elements and Liz provided us with 3 lovely pieces of cotton roughly 30cmx30cm. We were then able to experiment with numerous techniques to be able to create a pattern on our fabrics once dipped into our indigo dye. We could sew a pattern, use small bull-dog clips, elastic bands and intricate folds, as seen in the image above. We then dipped our prepared fabrics into our indigo bath. They would stay in for 3 minutes, then be taken out and rested, the longer they were in the air the stronger the colour became in the oxygen. The most we dipped our fabric was three times to strengthen the colour.
A sample piece which demonstrated three dips and the difference in colour
Every time we were able to open one of our parcels we got excited, we peered onto each others desks to see what we had been able to achieve. Some were much more patient than me.
Work by one of my fellow students
A truly lovely lady, Mari, who was working on the table next to me, had the patience of a saint and was able to sew a running stitch across her fabric in a wave design and achieved beautiful results when her work was unravelled.
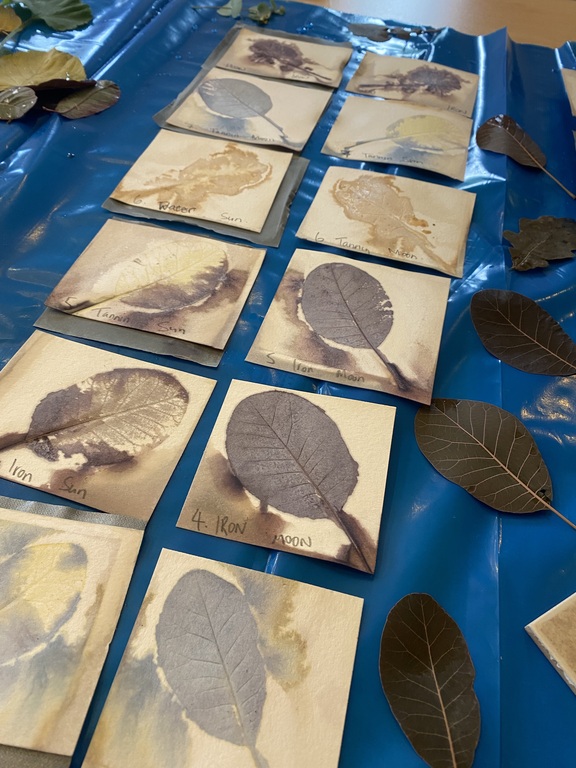
After a super lunch we progressed onto our botanicals and Liz provided us with 7 leaves each from a plant commonly referred to as a 'firebush' which she knew to be particularly great for printing. We had 14 pieces of paper and 2 ceramic tiles. To initiate the printing process we were provided with a shallow pot of water, a shallow pot of diluted iron and a pot of diluted tanning. By soaking your paper in different combinations of the three liquids you could achieve very different results.
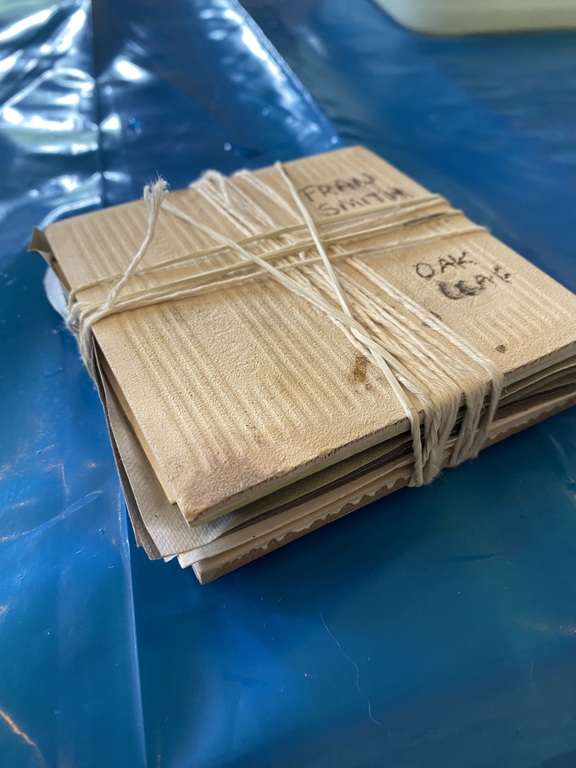
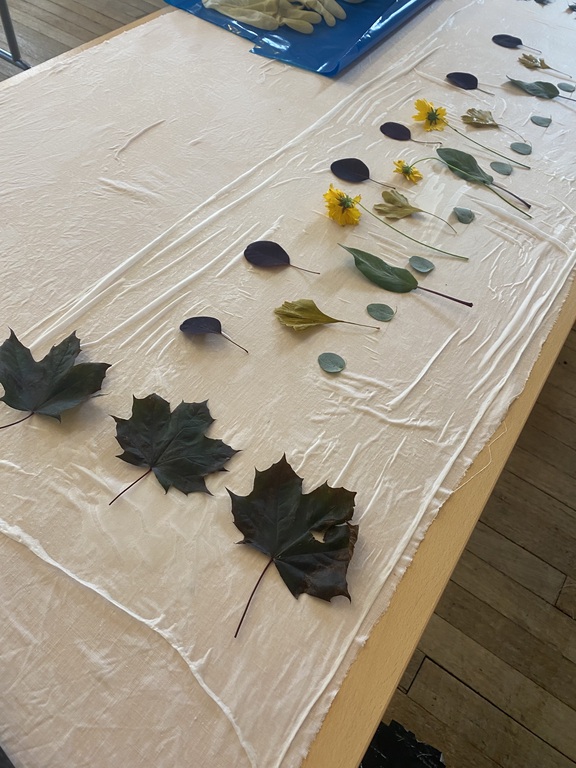
My bundle of botanicals
Once bundled up like a magical flower press, our tiles and contents went into a steamer and were left for just over an hour. It was like waiting in bed on Christmas morning when you know all your presents are downstairs waiting for you. When Liz told us they were ready we were all so excited.
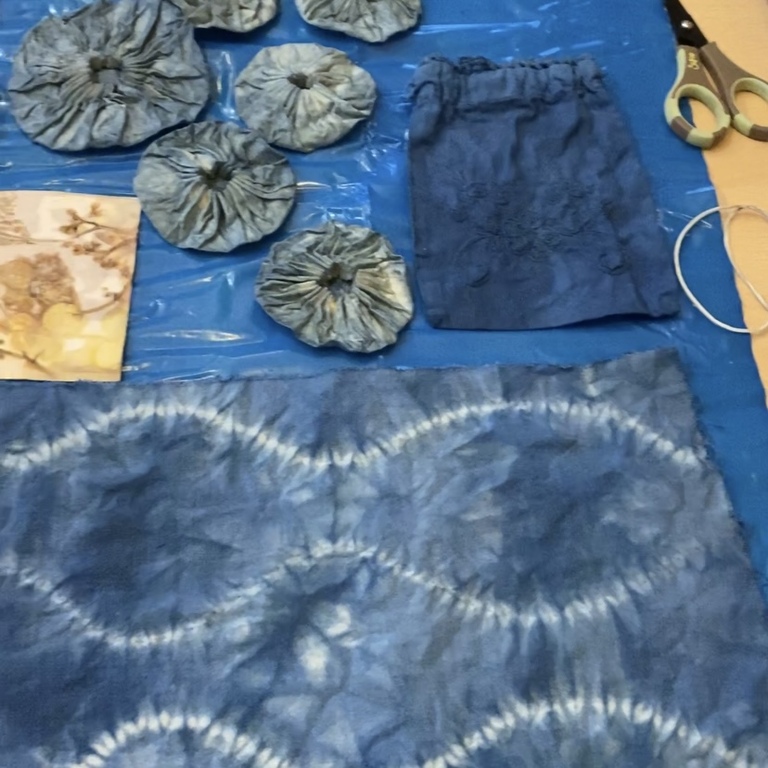
The variety of results we achieved
We were thrilled with the variety of results we received throughout this process, Liz was quite right that these leaves made excellent printers. The reason we completed this process, apart from it being really fun, was for us to understand which process we would like to use on our silk scarves the following day. Liz provided us with one small and one large silk scarf and our challenge for that evening was to take them to our rooms and mordant them. It is thought that a mordant helps the dye bite onto the fibre so that it holds fast during washing. We used soap to prepare the surface to receive our indigo dye.
How I laid out my design
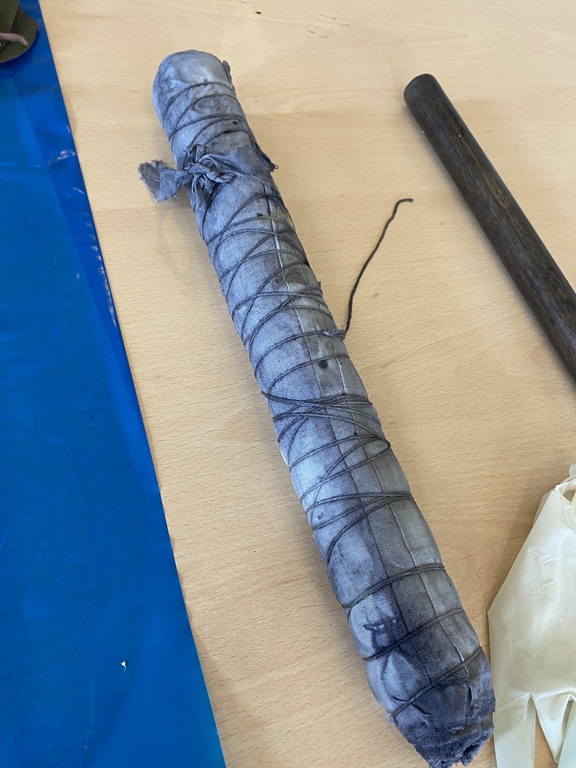
We woke on the Sunday morning eager to start the printing process on our scarves. On the above picture I laid out my choice of plant life and I hadn't included the sycamore leaves on each end. Liz reminded me that the ends of a scarf are the most important design element and encouraged me to be ambitious. (I'm so glad she did). We had a layer of cotton on the bottom, then the scarf and then a layer of cotton on top and then rolled it up, tightly, around a wooden dowel.
Another exciting parcel to unravel
Our rolled parcels were tied with string and straight into the steamer for an hour and a half. Patience was certainly and important part of the process but also made the activity all the more exciting as we waited to find out the results of our choices.
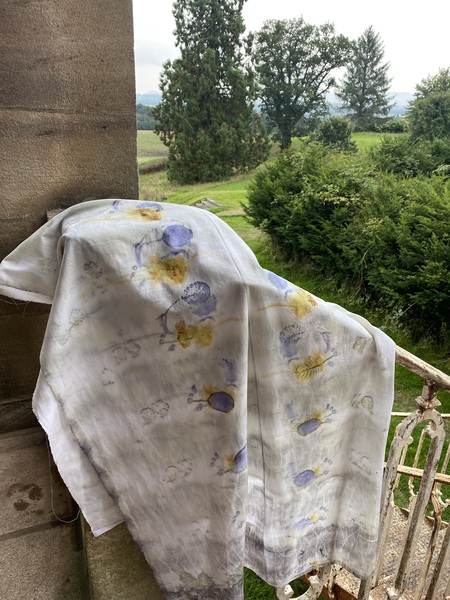
The result of the silk scarf
The cotton from either side of the scarf
I was as impressed with the cotton surround as I was my silk scarf. I liked the idea of being able to create an item of clothing or some cushion covers from this, Liz was happy for us take home everything we had created.
I also made a smaller scarf and when I unravelled the roll I felt the print wasn't defined enough, my little heart was a bit broken. With great enthusiasm Liz told me it was perfect for dipping into my indigo dye solution to see if that would help bring the prints to life- she is a genius!
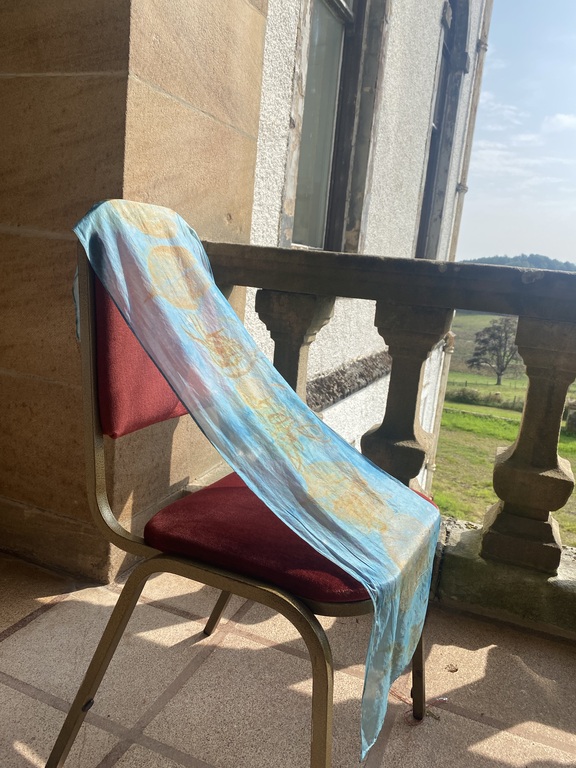
My smaller scarf dipped in indigo
We had perfect weather for our last day in Gartmore House. We dried our finished scarves and indigo pieces on a stunning balcony and were in awe of what we had all achieved in this fantastic craft retreat. This piece above was my absolute favourite- I had used Japanese Knotweed for this print, renowned for being a trouble maker in people's gardens but turns out to be a real success when it comes to printing!
Liz had inspired all of us to create some stunning pieces and encouraged us to experiment all weekend. She gave us all the information and ingredients to be able to continue with our new craft from home and we got to keep our beloved vat of indigo dye, that we had all grown quite attached to! I would recommend this experience to absolutely anyone who loves a beautiful stay in stunning surroundings and a fabulous weekend of creative joy! THANK YOU GARTMORE!
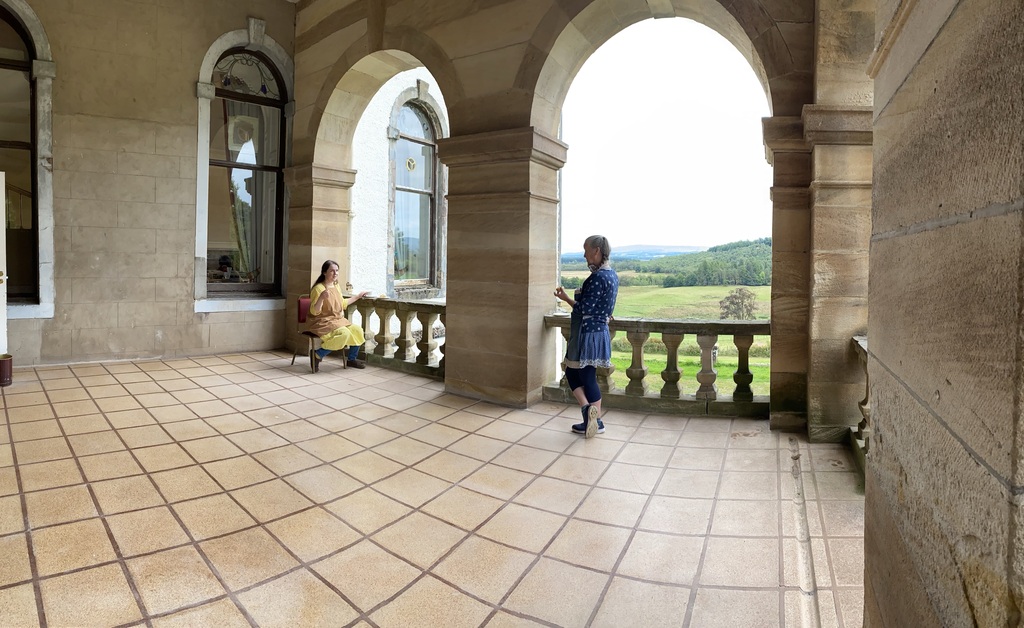
Mari and Liz talking about crafting even at lunchtime
Would you like to experience this for yourself?
If you have loved reading about Fran's experience then you too can book a place on a creative retreat at Gartmore House here.> They have 2-night and 5-night options available, every room is stunning and the grounds are incredibly inspirational.
Our website uses cookies to give you the best user experience. By using the site you are consenting to our use of cookies. You can find out more in our Privacy Policy.
You can manage your selection from the 'Cookie settings' in the footer of the page

.jpg)