Annie Sloan is widely recognised as one of the world's most respected experts in paint and colour and her Chalk Paint® range has led the upcycling revolution: great for our homes, great for our natural world too.
Many of us have used the paint to transform an old piece into something fresh and often colourful, however Annie is keen to share her passion for decorative painting too.
This step-by-step guide will instruct you through how to complete an overlapping stencilling project - giving you the tools that you need to be creative and adventurous in your upcoming projects.
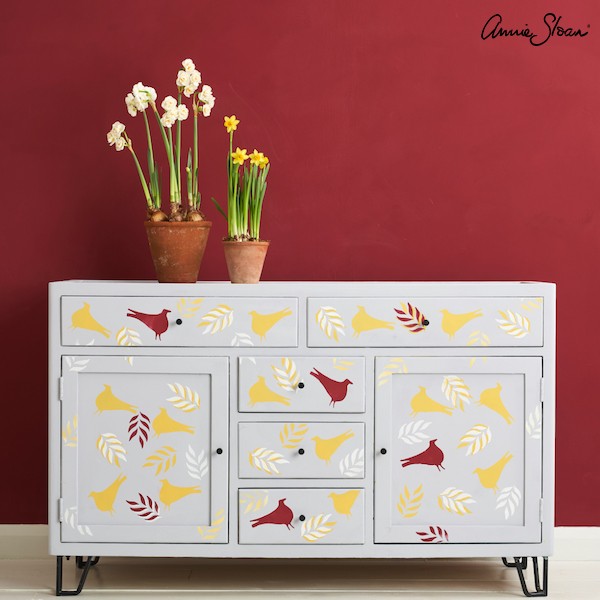
This overlapping stencilled chest project is taken from the most recent edition of The Colourist (Annie's Bookazine), in which the colour palette focuses on yellow - mellow, creamy, and earthy on one hand, zesty and singing on the other; paired with deep burgundy red and greys.


Test out your stencils and colours on a large sheet of paper first to ensure that they all work well together and as you imagined.

Step 1: Remove any knobs and handles from furniture. Paint the surface in Chalk Paint® in Chicago Grey.
Ensure that it is completely dry before stencilling.
Cut out your stencil (free with The Colourist )
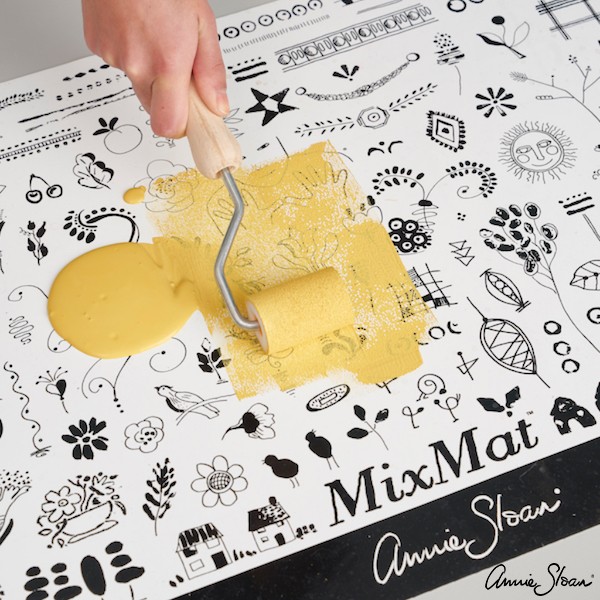
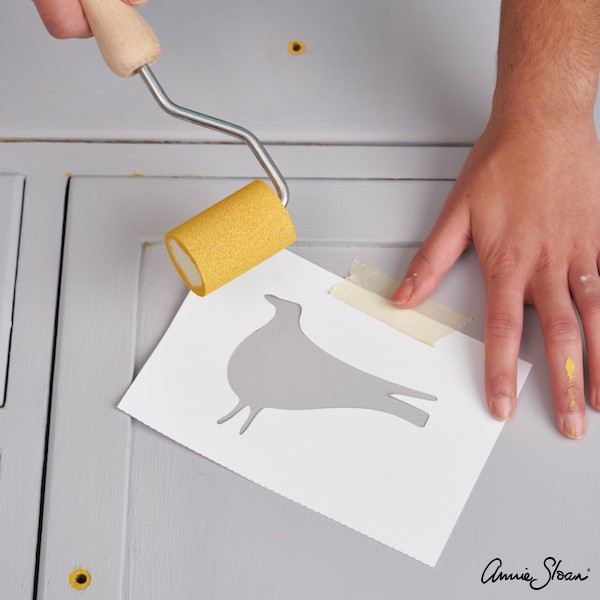
Step 2: Pour a small amount of Chalk Paint® in Tilton on to your mat.
Roll a small sponge roller back and forth to coat evenly, do not overload.
Step 3: Secure the stencil using masking tape.
First roller horizontally, then vertically.
Do not use too much paint - this will help to avoid paint spilling out under the stencil.
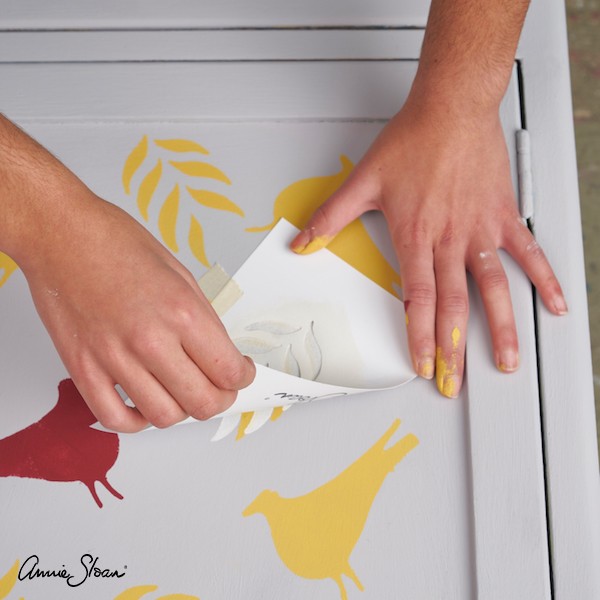
Step 4: Lift up the stencil carefully in one corner, holding the opposite edge down.
You can layer colours together - for this leaf Tilton and Old White colours have been layered on top of one another to create a shadow effect.
Remember to let each layer dry before applying the next.

Step 5: Keep adding stencils until you have the desired effect.
When the stencil motifs are completely dry finish and protect the entire piece by applying clear chalk paint wax.
It is best to apply the wax using a specific wax brush.

Step 6: Remove any excess wax with a lint-free cloth.
Show off to your friends!
If you are new to upcycling furniture or using Chalk Paint® then we do recommend attending one of many workshops or courses around the country, which will help you confidently step into the very rewarding world of furniture painting - take a look at the selection of courses on our site here >
If you need to purchase some Annie Sloan products to complete your project or if you want to get more inspiration visit their website >